Eggs. Eggs and I are not friends. I'm not really allergic to them, and it's not that I don't care for the taste, it's just that every time I eat them I get the worst stomach ache and the inside of my ears itch to the point where I consider using a power drill to fix it. So, accordingly, I often choose not to eat egg-intensive dishes. However, my love of cheese often outweighs my common sense and so I often make quiche!
This is a modification of my mom's recipe. She had already altered it to include a full pound of swiss cheese and a minimum number of eggs, but I found that by decreasing the cheese and increasing the meat that I could actually use even fewer eggs! In this edition, I've used sharp cheddar and some delicious fontina to enhance the flavor lost by reducing the cheese. I also decided that eating half a pound of bacon was probably a bad idea, so I switched to using turkey sausage instead.
Start by frying up half a pound of your meatstuff of choice. You could easily go ground beef with this, throw in a dash of taco seasoning, and call this quesadilla pie, but I didn't.
Then select your cheeses. I recommend using about 12oz of whatever combination you choose. Since this is "Poor Girl Cooks", I went with the cheapo sharp cheddar and half a wedge of fontina.
Now here is the embarrassing part: 99.9% of the time, I make my own pie crust to go with this (because let's face it, I make fantastic pie crust). Lately though, we've had a problem with our faucet leaking nasty water all over the counter and I just can't bring myself to roll out anything I later plan to eat on it. So I did the big bad, I went and bought refrigerated pie crust from Wegman's (which ironically tastes just like my own). At any rate, place a round of your preferred pie crust into a dish and cut slits around the bottom. Then place a thin layer of cheese...
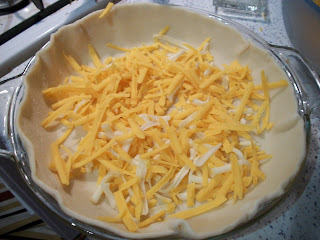
Followed by your meatstuffs...
And then add the rest of the cheese and the eggy goo.
Mmm no wonder my dad calls this "cheese pie".
You'll notice that you probably won't be able to even see most of the eggy goo, but trust me, it's enough. Do not panic at this point, your cheese pie will come out fantastic.
Pop that bad boy in the oven for about 45 minutes and take a quick nap with your adorable baby kitty.
Then, badda bing! You've got a one dish meal.
Now please, don't feel restricted to my recommendations, this is a super versatile recipe that can take almost anything. Shredded chicken and green peppers? Possible! Ground beef and jalapenos? Possible! Bacon and broccoli? POSSIBLE! And these are just the things that my cold-addled mind can come up with, so explore, explore!
Low-egg Quiche
1/2 lb of ground sausage
8oz of sharp cheddar
4oz of fontina
1 pie crust
3 eggs
1/2-3/4 cup of milk
Black and red pepper to taste
1.) Brown your sausage and set aside. Shred the cheese and toss to mix. Place crust into a pie pan and slit the bottom.
2.) Assemble the pie starting with a loose layer of cheese, followed by the meat and the rest of the cheese. DO NOT PACK DOWN.
3.) Whisk together three eggs and and the milk. Add the pepper to taste. Pour over assembled pie as evenly as possible.
4.) Bake at 350 degrees for 35-45 minutes or until the top is browned and the eggs are set. Remove and allow to cool for about 15 minutes before slicing.
The Cracked Kettle
Some thoughts on life and the world and also fun things that I find.
Saturday, September 25, 2010
Wednesday, September 15, 2010
Poor Girl Cooks: Sticky Buns for People Who Like to Sleep In
When I was younger and less concerned about my waistline, the one weekend a year when my mom would break down and make sticky pecan rolls was the best weekend in the world. I've never really understood what would spur her to make them (I think if I had figured it out, I would have exploited it endlessly), but I was sure glad when she did. The batch never made it to Monday morning. They are some of the tastiest breakfast treats ever created by God or man or my mom. Therefore, when I inherited my very first KitchenAid I made it a priority to learn to make sticky buns. I suddenly learned the great drawback to this fantastical recipe: they take over FOUR HOURS to make. No seriously, four hours. And that's rushing things along! You see, my mom uses a double rising dough (is that a real name for it?), and rising takes quite a bit of time, especially in the middle of a cold Pullman winter. That, coupled with the kidnapping of my KitchenAid by a storage unit, has led to no further attempts to make my own sticky buns (minus the small incident last spring involving a whole wheat attempt).
I sulked around about this problem for a bit until one day I saw an article about a quick and easy way to make cinnamon rolls! Turns out if you take frozen or tinned biscuits, mush them all together to make a sheet of dough, you can actually use them to make cinnamon rolls with great success! And even better, the recipe can be further adapted into sticky buns! Joy unbounded!
These are of course some of the healthiest things you can make...for your soul. They bring it one step closer to being set free...
Please ignore the half pound of butter staring you in the face.
When I starting to make the sticky sauce, I forgot to adjust for the fact that I was making a much smaller batch of buns and I may have made entirely too much sauce.
Yes, entirely too much sauce.
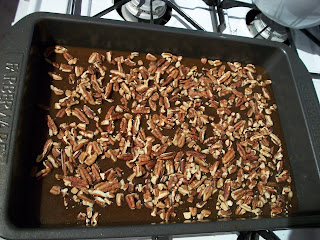
At any rate, pour your sauce into the pan and add your nuts.
Yes, I meant that variety of nuts.
Set the pan aside and pop your biscuit tins and lay them out in a rectangle type pattern. Then proceed to smoosh them together. This could take a while and probably won't be perfect.
Paint on a layer of butter, sprinkle with cinnamon sugar, and roll up into a little roll of deliciousness.
Slice it into 1"-1.5" rolls and arrange on top of your nuts. Then bake, remove, flip, and admire.
Perhaps not as delicious as my mom's thoroughly prepared recipe, but still amazing AND I got to sleep in. Highly recommended.
Sticky Buns for Sleepy People
adapted from Nerdist.com and my mom
Sticky sauce (adjusted for volume)
1 stick of butter
1/2 cup brown sugar
1/2 cup dark corn syrup
Pecans or walnuts (or any other nut you prefer)
Melt the butter in a saucepan and stir to incorporate the brown sugar and syrup. Pour into a baking pan and sprinkle with nuts. Set aside.
Buns
2 tins of biscuits
Melted butter
Cinnamon sugar
Open tins and lay out biscuits in a rectangle. Smoosh together to form a coherent sheet, brush with butter, sprinkle with sugar, and roll. Slice into 1"-1.5" rolls and arrange in your pan of sticky sauce. Bake at 375 degrees for about 20 minutes or until the buns look done. Remove, cool for about 5-10 minutes, then invert onto a foil lined surface (trust me, you'll appreciate not having to clean up sticky sauce). Eat as many as your diet may (or may not) allow.
It's Time for the Talk: the Truth about Macaroni and Cheese
Dearest followers, it's time. It's time to have "The Talk". The Talk about the nitty gritty. The Talk about the reality of the world around us. The Talk about the noodles and the cheese.
Now let's face it, I am rarely described as a patient woman. I am, however, often described as a woman who loves her cheese. Once, on a long cold winter night, I asked my dearest friend, Michelle, to make me her mother's macaroni and cheese. She then shelled out hours of her time and many of her dollars slaving over an amazing dish that I historically called "not as cheesy as I was expecting". This statement clearly began a curse that proved quite difficult to shake off.
Then, a couple of months ago, I asked Michelle to send me the recipe (yes, this is the Michelle of Delicious Enchiladas fame). She did, and though concise, I felt it adequately expressed the steps needed to acquire my own dish of creamy amazingness. I also thought that I knew better than the years of experience that went into the recipe and I thought that I would simply make it cheesier. I was wrong. The resulting sandpaper and noodles was so unpalatable that even Adam agreed we should throw it away. A mad cooking panic ensued, wasting not a few pounds of cheese and boxes of noodles, and driving me over the edge. Even Adam's grandfather commented on my inability to make this simple dish (although he did encourage me to continue trying). So I present to you the learning curve of the ever classic Macaroni and Cheese.
First of all, there really is a particular cheese ratio that makes the recipe work. THIS is an example of entirely too much cheese:
And THIS is how much cheese you are supposed to use:
In fact, it is exactly how much cheese you should use (when the recipe is halved). Turns out that if you follow directions, these things work out far, far better in the long run. It also makes a big difference if you use cheeses outside of the usual cheddar. Michelle suggested a bit of Fontina, which I've decided is my new favorite cheese (quiche recipe coming soon!). It's buttery, smooth comfort flavor was perfect to round out the sharpness of the cheddar and add another layer of creaminess. I probably would have shredded up the whole block if I wasn't determined to follow directions for a change. I can be pretty headstrong when I start to feel like a failure.
Then came time to make the Béchamel sauce. This is where my problem with patience comes into play. This sauce requires warming milk and flour...
...and letting it get thick, then adding in your cheese of choice until it is well melted.
When I first attempted this, I left the heat on through the whole process and ended up with a sad version of liquid sandpaper. In fact, I was so frustrated with it, that I gave up on the Béchamel sauce altogether! My next attempt involved a sad slow cooker recipe made primarily of evaporated milk and the tears of starving children. The sauce and I needed some time apart.
After a bit of counseling we got back together and learned that when you add your cheese, you MUST KILL THE HEAT. This is important. Turns out if you do it, you get a sumptuously perfect sauce that is fit to serve to anyone!
At this point I caved and starting eating greedily, but to properly finish this dish you should bake the sauce into the noodles and get a tasty cheesy crust on the top.
All told, Michelle and her mom seriously know what they are doing when it comes to the Macaroni and Cheese. The key is to follow instructions, follow them patiently, and trust in years of trial and error. I present to you, with some elaboration:
Mom's Mac 'n Cheese
from Michelle and her mom
8 oz macaroni, cooked al dente
2 and 2/3 cups of milk
1/2 cup of flour
seasoning salt
pepper
Stir flour, salt, pepper into cold milk. Cook at medium heat, stirring constantly, until mixture boils. If too thick, add a little milk. After boiling for at least a couple minutes, turn off the heat add the following:
4-6 oz shredded sharp cheddar
2 oz shredded fontina
a couple of slices of swiss, cut into small pieces
Parmesan if you like
Stir to combine. Drain pasta, combine with cheese sauce, and bake at a 375 until brown (~30 mins).
Saturday, September 4, 2010
I hope you still love me... or My story of terrible luck
Dearest followers,
Many apologies for the complete lack of posts for the last...well, at least the last three weeks. Possibly longer, I lost track. See, my computer decided to up and off itself recently! I had catastrophic hard drive failure, which would have been okay and easily repaired if Dell hadn't shipped my new hard drive to WA, where I do not live. Fortunately the girl in India who answered my complaint call knew that WA and NY were not geographically near, so about a week and a half later I had a new hard drive! Hooray!
Except not. They sent me the wrong version of Windows pre-installed, so there was a bit of a hassle with that. Then I had to make a mad dash to Toronto (more on that in a later post) which set it back another weekend. Then, once I finally had time to sit down and make the darn thing work, it decided to inform me that a)my network card didn't work anymore; b)my battery had "expired"; and c)my motherboard was shot. Seriously?!?! Now keep in mind that my computer is about 18 months old and still under warranty. Tech support had the nerve to tell me that this was pretty typical for a computer of this age. So I waited another week for the other new parts to go to WA, get lost, come to NY, and arrive at a tech's house so that he could come out after work one day and install them.
That was yesterday. He was here for about 2 hours, which caused us to miss the Coheed and Cambria concert at the NY state fair (in the interest in full disclosure, it was pouring rain as well), and when he finally declared it all done he handed it over and we thought everything was better forever! Then as he was driving away we realized that I no longer have any mouse functions and only 1 working USB port. I frantically called him before he could get too far down the road, at which point he informed me that the motherboard must have been dead on arrival. By now, I'm pretty well done with Dell. So now I'm waiting for yet another motherboard to make its circuitous journey around the US to arrive and my house and get installed. Also, because of the corrupt motherboard, Windows isn't exactly functioning correctly, which makes it a great fun to try and pass the security check on most websites.
So AT ANY RATE, I hope all of you still love me and are interested in reading what I've done. I've got several stories in the can, so to speak, and some of them will be going up retroactively so that you'll get the chance to read them in order. We're looking at the following topics (at least):
Vanilla Ice Cream (review of Vanilla Bean Paste)
Successful Macaroni and Cheese
Review of the Awesomest Tea Mug ever made
Trip to Toronto and Niagara Falls
and much, much more!
Oi, I better get to typing. Many thanks for your continued loyalty!
My best,
Katie
Thursday, August 26, 2010
Quick pick: Thai Tea Ice Cream
Due to unexpected technical difficulties, I was unable to salvage any of the photos for this post. Thusly, it'll be quick!
This is not an original recipe, but rather one from MAC & CHEESE (who unexpectedly write about ice cream on occasion) and it is utterly fantastic. The only thing that I would change is the sheer volume of loose tea that they ask you use in this recipe: really friends, 1/3 of a cup is a bit much if you aren't using a large french press. You could easily cut this down to just double strength brewed tea and save yourself a bit of a hassle. I found the tea that I used from Teavana, which is a pathetic hippy chain of tea nuts (not the good variety), but which happens to have had this tea when I was buying the most amazing mug ever. Still, it came out fantastic and is strongly recommended to anyone who enjoys an ice cold glass of classic Thai Tea.
Thai Tea Ice Cream
by MAC & CHEESE
1/3 cup loose leaf Thai tea (or enough to make double strength, depending on your pot)
2 1/2 cups water
1 cup sweetened condensed milk
1 cup half and half
* Add 2 1/2 cups of hot/boiling water to loose leaf Thai tea, and steep for 20 minutes (this is more water than the brewed tea called for in the recipe, because some of the water will be absorbed by the leaves). Strain tea (I pushed the French press plunger down) and let cool to room temperature.
* Mix 1 1/2 cups brewed tea, sweetened condensed milk, and half and half in a large bowl.
* Process mixture in an ice cream machine. Chill overnight in the freezer before serving.
Monday, August 16, 2010
Poor Girl Cooks: Ultra easy vanilla ice cream
Do you ever sit and think to yourself "Boy I wish I could make ice cream with things in my cabinet"? Because I sure do! And when I came across this recipe for vanilla ice cream on Baking Bites, I knew it was a dream come true.
In addition, I had recently read an article on vanilla bean paste. Vanilla bean paste is a specialty item (I've only been able to find it at Williams-Sonoma) that can be substituted for vanilla extract in any recipe where you want a strong vanilla flavor and pretty little vanilla specks. Now whoever named this used a bit of creative liberty with the words, as it is not at all paste like, but rather like a thick syrup. It pours easily, which is convenient since since the opening of the jar is not well designed for inserting a spoon (nor should you ever insert a spoon into a jar of something, as this can cause unnecessary early spoiling from contamination). It also smells *amazing*, although I managed to refrain from eating it straight out of the jar. I'm pretty sure it's made primarily of bourbon...
Okay, so, ice cream! With only 5 easy ingredients, this recipe wasn't that great for an abundance of pictures. You whisk everything together...
And put it in the ice cream maker. The sour cream adds a particularly nice lightness to this, as you don't feel weighed down by the sweetness of the condensed milk.
Here's a shot of those delicious vanilla flecks though:
Well worth the $11 investment. I highly recommend the use of the vanilla bean paste!
Ultra Easy Vanilla Ice Cream
by Baking Bites
1 14-oz can sweetened condensed milk
1/2 cup sour cream
2 cup half n’ half
1 cup milk
2 tbsp vanilla extract (or vanilla bean paste)
Combine sweetened condensed milk and sour cream in a large bowl and whisk until smooth. Whisk in half n’ half (or light cream), milk and vanilla extract until well blended. Pour into prepared ice cream maker and freeze according to manufacturers’ directions.
Transfer to a freezer-safe container and freeze for about 2 hours, or until ready to serve.
Makes about 1.5 quarts ice cream
Sunday, August 15, 2010
Double feature!: Brownie Cheesecake and Layered Strawberry Pudding
The end of the summer can only mean one thing: Adam's annual family reunion. Last year we managed to escape unscathed due to his sister's wedding and subsequent cancellation of the reunion, but this year there was no where to run. Don't get me wrong, we love his family, it's just that, well, there are a few in every bunch if you know what I mean. My mother in law hates to bake, so she asked me to bring dessert! With 16 people and a variety of dietary needs, I picked a super simple brownie cheesecake and a cool layered strawberry pudding. The weather was projected to be wicked hot, but remained quite pleasant, and I'm really glad I chose cool desserts.
Brownie Cheesecake!
This is another one of those semi-cheater recipes where I followed the instructions and bought a pre-formulated brownie mix. The first step involves taking a portion of that mix, sifting it with flour and stirring in some melted butter to make the crust.
The recipe recommends not greasing the pan and I can deeply understand why: the crust was so greasy I couldn't get it to commit to a solid layer. It kept slipping and sliding around all coy like, simply refusing to become a crust. But I won.
And then I used the same mixing bowl to make the delicious cheesecake part. I'm pretty sure that this isn't FDA approved, but since the recipe didn't contain anything that you can't eat raw, I figured I was in the clear. Once you beat your cream cheese into fluffy submission, add the rest of the brownie mix and the included package of liquid fudge.
Don't you wish you were in my kitchen right about now? When you turn the mixer back on the batter will quickly pick up a mousse like consistency, which is pretty fun. Then you pour it over your prepared crusty parts (and pray that they've stopped sliding around under pressure). Pop that baby in the oven for the recommended time based on your pan size and viola! Chocolate cheesecake.
Betty Crocker tried to convince me to add a can of cherry pie filling on top, but I found the idea rather vile, so instead I took a box of fresh berries to put on top (and promptly forgot them in the refrigerator when it came time to serve). The recipe says that this little cake serves 16 people and it is not kidding; this is one of the most crazy rich cheesecakes I've ever eaten. And oh so good!
Brownie Cheesecake
adapted from Betty Crocker
1 box (1 lb 2.4 oz) Betty Crocker® Original Supreme Premium brownie mix
3/4 cup flour
1/3 cup butter or margarine, melted
2 packages (8 ounces each) cream cheese, softened
1 1/2 cups heavy cream
1.) Heat oven to 350ºF. Stir together 3/4 cup of the brownie mix, flour and the butter. Press in bottom of ungreased springform pan.
2.) Beat cream cheese in large bowl with electric mixer on medium speed about 2 minutes, scraping bowl frequently, until smooth. Add remaining brownie mix, the whipping cream and chocolate syrup. Beat on medium speed, scraping bowl frequently, until smooth. Pour over crust in pan.
3.) Bake 45 to 50 minutes or until set; cool 20 minutes. Run metal spatula along side of cheesecake to loosen before and after refrigerating. Cover and refrigerate until chilled, about 2 hours.
=========================================================
INTERMISSION
=========================================================
Layered Strawberry Pudding!
I want you to know that I agonized over what to call this dish. My mom used to make it for fancy dinner parties when I was a kid, so I asked her for the recipe and she didn't include a name! So I made one up. Think of pudding in the British sense, not the slimy sense, except that it is served cold. Or something.
Start by tearing up an angel food cake into itty bitty pieces...
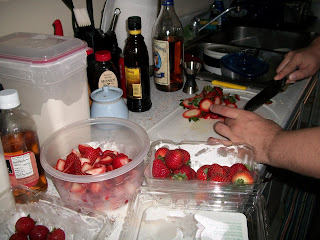
...and by convincing the boyfriend to slave over slicing two boxes of strawberries. Sprinkle the berries with a smudge of sugar to get them to release their juices, but not too much because this dish turns out pretty sweet on its own.
Then start whipping up a couple of boxes of pudding. Originally my mom told me to use French Vanilla, but then about halfway through the whipping step she sent me a twitter update saying that perhaps she had meant white chocolate. Either way, I was stuck with a bowl of neon yellow goo and I decided to roll with it. No one knows the difference, right?
Okay, the difference is pretty clear. Ignore that part.
Take a very large bowl and place a layer of cake pieces in the bottom. Add a layer of strawberries, pour in some pudding, smooth over a layer of cool whip. Then add a layer of cake, strawberries, pudding, etc. Continue until you either run out of bowl or out of ingredients, but end with a cool whip layer. That way, if you are smart, you can make a pretty design out of strawberries on top. Or you can be like me.
And Adam's version of what to do with leftovers:
When you serve this, it is best to go straight down into the bowl and take a deep scoop. This way you get the most possible layers and create for yourself a little tunnel of deliciousness:
Layered Strawberry Pudding
1 angel food cake (premade or make your own, I won't judge)
2 boxes of fresh strawberries
a little sugar
1 large tub of whipped topping
2 small boxes of instant white chocolate (or possibly french vanilla) pudding
4 cups of milk
Tear angel food cake into little pieces. Slice strawberries and toss with a little sugar to release the juices. Whisk together milk and pudding mix, following the instructions on the box. In a large, preferably glass, bowl, layer in the following order: cake, strawberries, pudding, whipped topping. Continue until bowl is full or ingredients run out, but be sure to end with whipped topping. Chill for a few hours and serve with deep scoops.
That's it for this year's family reunion. Let's see if he keeps me through next year's...
Subscribe to:
Posts (Atom)